DIY Time-lapse Dolly
I recently purchased a Pico Dolly so I could attempt to make a self-contained time-lapse dolly that I could take anywhere.
Here is the Pico Dolly with the first step complete. I used the rim of a lid that went to an old pill container and attached it to the inside of the wheel. I had to take the wheel off and then replace it using a small hex key.
I used fishing line tied through the spokes of the wheel to attach the lid so I wouldn't damage the wheel with glue or drill holes.
Next I took 2 pieces of plywood and attached them to the dolly using 1/4 inch bolts through the predrilled standard tripod screw holes in the dolly.
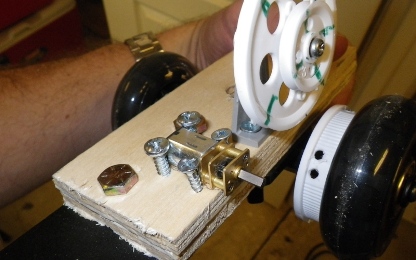
Then I attached the pulleys from a motorized pulley set from Hobby Engineering.
The miniature metal gear motor I purchased separately from Hobby Engineering came next.
Finally I connected a rubber bands to the pulleys, a battery pack, and a potentiometer to use as an on off switch and to modulate the speed a little further as needed.
Ultimately I had to attach another rim to the front wheel because I had some trouble getting traction with just one wheel and with the elasticity of the rubber band, the motion needed to be a little smoother. Here is the first video I made with this setup.
The biggest draw backs to this rig are that despite gearing down the rpms, it still moves a little too fast for most natural outdoor scenes. Also it has to be on a relatively smooth and level surface.
UDATE: 11/21/11 - Here is my second version using a chain and sprocket system
Labels: photography, pico dolly, time-lapse


